Asset management is a critical aspect of any business. Keeping track of your company's assets can be daunting, but it is vital for ensuring that your business operates smoothly. Fortunately, there is software available that can help you organize and manage your assets efficiently. One such software is Snipe-IT, which is available for installation on both CentOS and Ubuntu operating systems.
Installing Snipe-IT on CentOS and Ubuntu
To install Snipe-IT on CentOS and Ubuntu, follow the steps below:
- Ensure that your system is up to date by running the following command:
sudo yum updateorsudo apt-get updatedepending on your system. - Install the required dependencies by running the following command:
sudo apt-get install php-curl php-mbstring php-zip php-xml php-mysqlon Ubuntu andsudo yum install php-curl php-mbstring php-zip php-xml php-mysqlon CentOS. - Install Apache web server by running the following command:
sudo apt-get install apache2on Ubuntu andsudo yum install httpdon CentOS. - Install MySQL by running the following command:
sudo apt-get install mysql-serveron Ubuntu andsudo yum install mariadb mariadb-serveron CentOS. - Create a database and user by running the following commands:
CREATE DATABASE snipeit;GRANT ALL PRIVILEGES ON snipeit.* TO 'snipeit'@'localhost' IDENTIFIED BY 'password'; - Install Snipe-IT by running the following command:
composer create-project snipe/snipe-it - Configure Snipe-IT by editing the .env file and adding the database information:
APP_ENV=local APP_DEBUG=true APP_KEY= APP_URL=http://snipeit.example.com DB_CONNECTION=mysql DB_HOST=127.0.0.1 DB_PORT=3306 DB_DATABASE=snipeit DB_USERNAME=snipeit DB_PASSWORD=password
- Generate a new APP_KEY by running the following command:
php artisan key:generate - Set the correct permissions on the storage and public/uploads directories by running the following commands:
sudo chgrp -R www-data storage bootstrap/cache public/uploads sudo chmod -R ug+rwx storage bootstrap/cache public/uploads
- Finally, restart Apache by running the following command:
sudo service apache2 restarton Ubuntu andsudo systemctl restart httpdon CentOS.
Images of Snipe-IT Dashboard
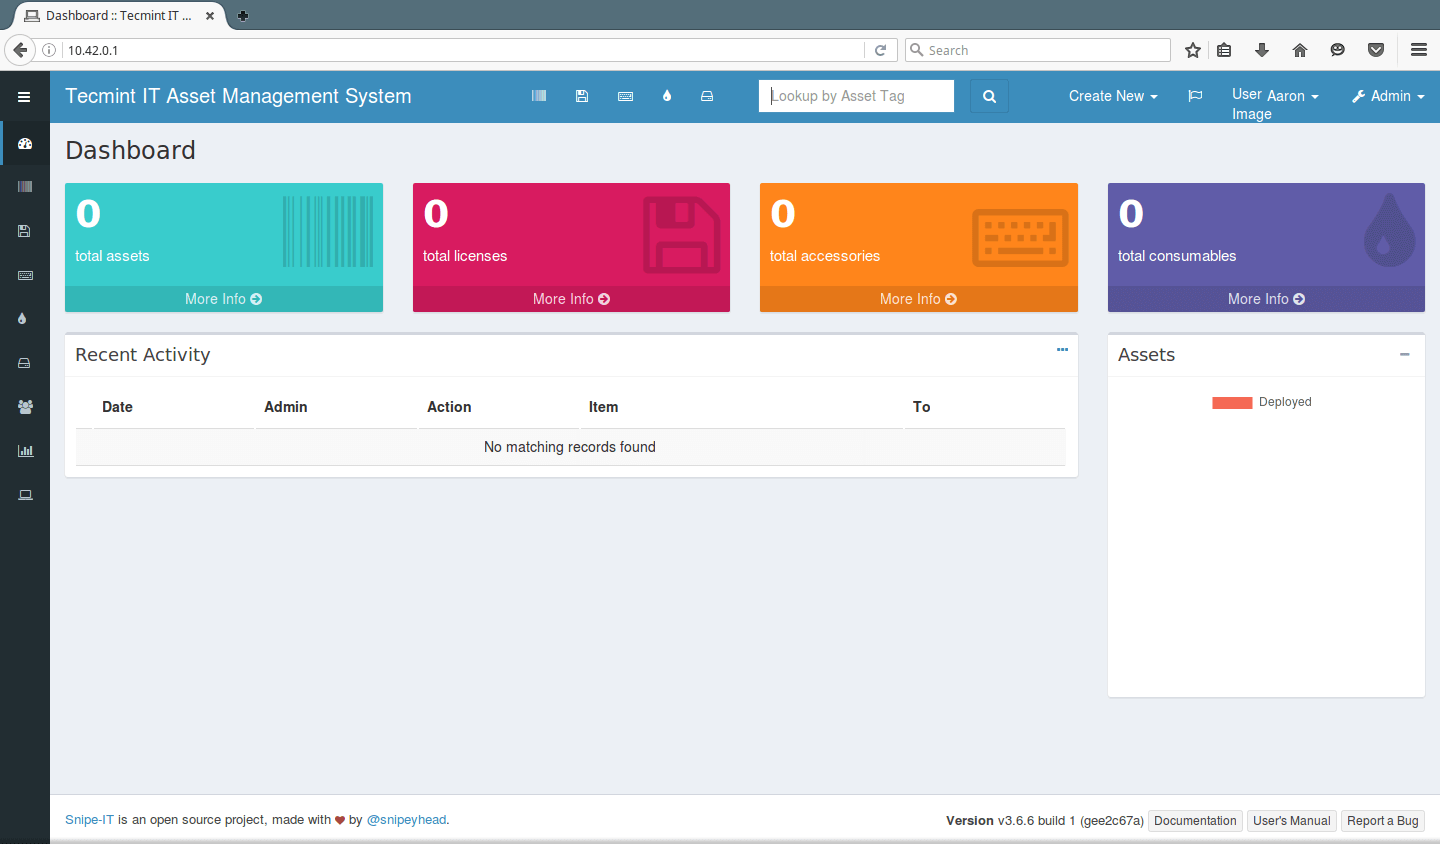
Image 1: Snipe-IT Dashboard

The Snipe-IT dashboard is the main interface for managing your assets. It provides an overview of your assets and allows you to perform various actions, such as adding new assets, viewing asset details, and generating reports.
Image 2: Docker Image of Snipe-IT

If you prefer to use Docker, you can use the Docker image of Snipe-IT. This image is available on GitHub and is regularly updated.
Image 3: Snipe-IT Dashboard Graphs and Reports

The Snipe-IT dashboard also provides various graphs and reports to help you analyze your assets. You can view data such as asset value over time, asset allocation by department, and maintenance history.
Custom Links in Netbox for Snipe-IT Asset Management
If you use Netbox for IP address management and Snipe-IT for asset management, you can create custom links in Netbox to link to Snipe-IT. This can be helpful when you need to view the details of a specific asset or perform maintenance on it.
Image 4: Custom Links in Netbox for Snipe-IT Asset Management

Creating custom links in Netbox for Snipe-IT is relatively easy. First, you need to generate an API token in Snipe-IT. Once you have the API token, you can create a custom link in Netbox to link to Snipe-IT. This can be done by editing the base.html template in Netbox and adding a link to Snipe-IT with the API token.
In summary, Snipe-IT is essential software for managing your business assets efficiently. By following the steps outlined in this post, you can install Snipe-IT on your Linux system and start managing your assets easily. Moreover, the Snipe-IT dashboard offers various graphs and reports to help you analyze your assets, and custom links in Netbox can help you link to assets in Snipe-IT easily.